Ever see a large map of the world posted on a wall with pins sticking out marking places that the person who posted the map had visited? Ever want a map to display your vacations or places you’ve lived?
I did a while back and purchased a world map I started to put pins in the locations that I had visited, and it was great. The only problem (aside from the fact that I needed to visit many more places) was that the pins designated the location, but I wanted a guide to show when I visited the various places and perhaps display a line or two about the trip. There just wasn’t space on the map to do that.
With the Internet, it’s now very easy to create a map that can show the places you’ve been as well as a little blurb you’ve written about the location or trip.
You can utilize Google Maps for free to create a map identifying the places you’ve visited around the world, the places that you’ve lived, or both at the same time!
In a previous article, we explored using Google Maps to create a visual representation of where your ancestors came from, but this article is about preserving your travels.
Use the service whichever way that suits your needs best. Below are instructions on how to map your personal travels.
Create markers and descriptions, even upload pictures of the locations by using Google Maps. Example:
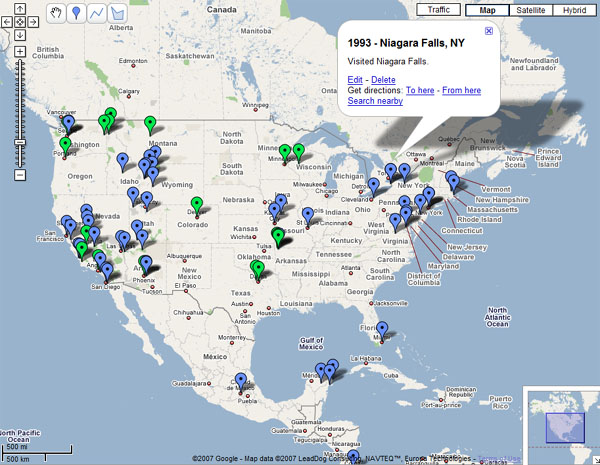
Setting up Your Visual Vacations Map
- You’ll need a free Google Account. If you don’t have one, click the “Sign In” link at the top of the Google Maps page to create a free account (this way, you’ll be able to save your maps).
- Once you have an account, click on the “My Maps” tab on Google Maps.
- Select “Create New Map” and name your map.
- You’ll now be able to add place markers and lines to your map by clicking the icons in the top left of your map.
- When you set a marker, you can give it a name. You could enter the date you visited (or lived there) and the name of the place as a good naming convention for the title. Add a description about the place or your visit.
Customizing Your Personal Location Map
Once you’ve created a number of places that you’ve visited on your map, you may want to differentiate between places where you lived, took vacations, and traveled to for work. Customizing your map is no problem. When you click on a location marker to edit the description, click on the location marker that appears up in the description. You can then change the color or type of marker. Use one color for places you’ve lived, a different color for the vacations you’ve taken, and a third color for business travels.
Adding Pictures
You can add pictures to the location descriptions by clicking the “Rich Text” or “HTML” options. You can click the picture icon in the “Rich Text” mode to link to a picture you’ve posted online or you can embed links within the HTML code in the “HTML” editing view of the description. You can even embed video!
Sharing Your Vacation Pictures and Travels with Others
If you would like to share your newly created map, click the “Send” link located above your map, and you’ll be able to email your map to your friends and family.
Have fun, and get started!